In-Office Teeth Whitening: What a Real Session Looks Like
Presenting problem
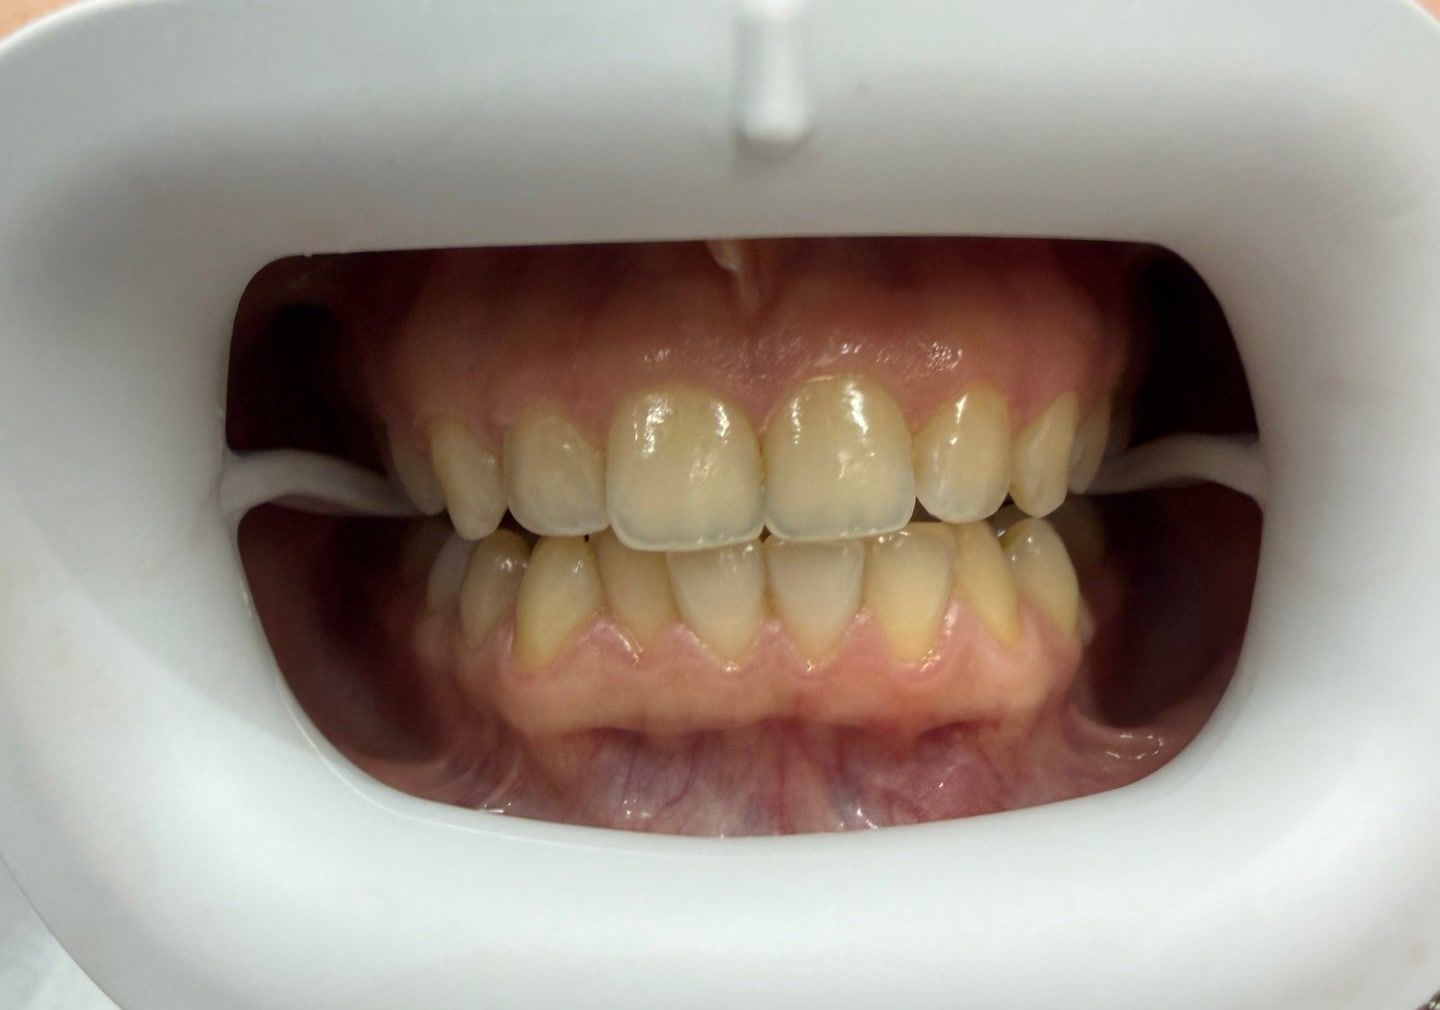
A patient who wanted a visibly brighter smile. The starting photo shows the natural situation most adults recognise: structurally healthy teeth with a yellowish shade picked up over years of tea, coffee and normal wear.
Treatment
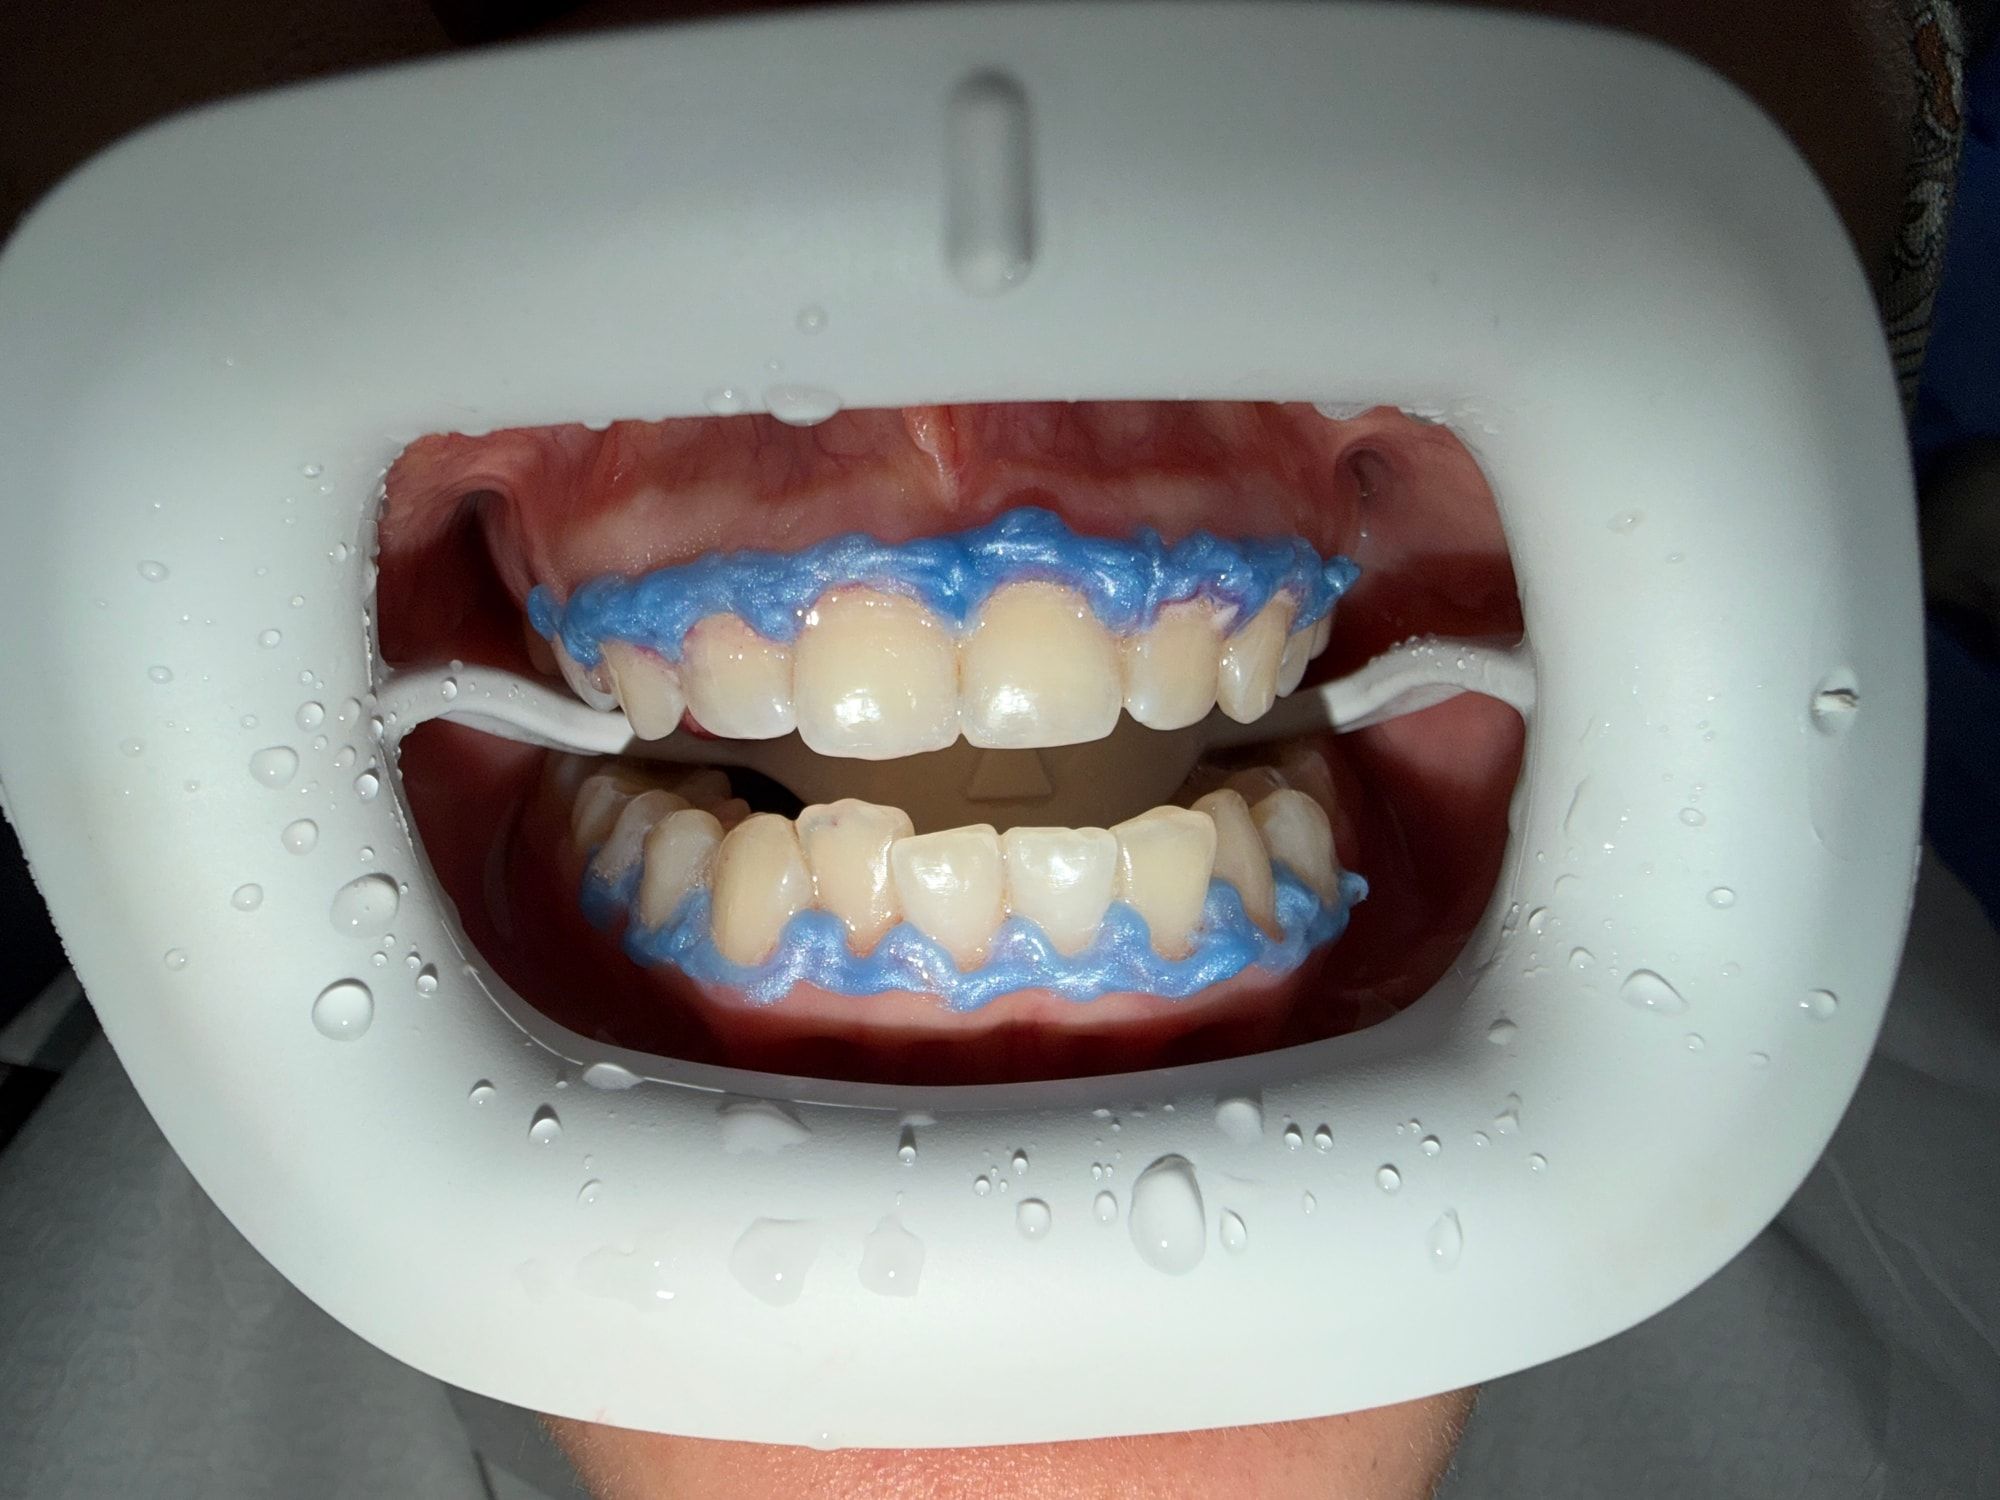
A single supervised in-office whitening session. The gums were first sealed off with a protective barrier, then the peroxide whitening gel was applied to the teeth in controlled cycles, with the shade checked against the starting point at the end.
Check-up first
Whitening is only done on healthy teeth — a quick exam confirms there is no untreated decay or gum inflammation, since gel on a leaking filling or inflamed gum causes avoidable pain.
Gum protection
A cheek retractor is placed and the gum line is sealed with a light-cured protective barrier — the blue border visible in the photo — so the gel only touches enamel.
Gel cycles
The whitening gel is applied in supervised cycles of roughly 15 minutes, rinsed and reapplied, with the whole visit taking about an hour.
These photos are from a real whitening session performed by Dr. İşler, shared with the patient’s written consent. Rather than a polished marketing before/after, they show the part patients actually ask about: what happens in the chair.
What do the photos show?
The first photo is the honest starting point — healthy teeth with the yellowish shade most adults have. The second was taken mid-session: the gums are sealed under the blue light-cured barrier, and the whitening gel is sitting on the teeth. That blue barrier is the main difference between dentist-supervised whitening and over-the-counter kits: the active gel is considerably stronger, so the soft tissue around the teeth has to be properly protected while it works.
How does the gel actually whiten?
The gel’s active ingredient (hydrogen peroxide) breaks down the stain molecules trapped inside the enamel rather than scrubbing the surface. That is why whitening works on the overall shade of the tooth, and why it does nothing for crowns, veneers or fillings — a point we always check before treating, so a visible filling doesn’t end up darker than the teeth around it.
What results should you expect?
Typically a few shades of lightening from a single in-office hour, with the final result settling over the following days. Results genuinely vary with your starting shade and the cause of the discolouration: yellowish staining (like this patient’s) responds best, greyish or tetracycline-related shades respond less. Some patients feel short, sharp cold sensitivity for a day or two afterwards; it settles on its own.
Is whitening safe for the teeth?
Supervised whitening on healthy, examined teeth does not damage enamel — the research on this is consistent. The risks come from skipping the checks: whitening over untreated decay, leaking fillings or inflamed gums, or overusing high-strength gel without supervision. That is why our whitening always starts with the check-up, not the gel.